Showing posts with label home decor. Show all posts

Friday, 3 December 2021

"Peace" Christmas wall decor for Creative Artiste

 Hello and happy December, friends! I love to decorate for Christmas, and have been making cards as well; right now my craft room is completely destroyed, spread with craft supplies, bins of decorations and ornaments, and Amazon delivery boxes!! Bonus-I have to have it all cleaned up and put away in time to use it as a guest room when my son comes home in a couple weeks! I'm actually grateful to have that incentive, or it could stay somewhere between "there appears to have been a struggle" mode and complete all-out "aftermath of natural disaster" mode until mid-January at least.
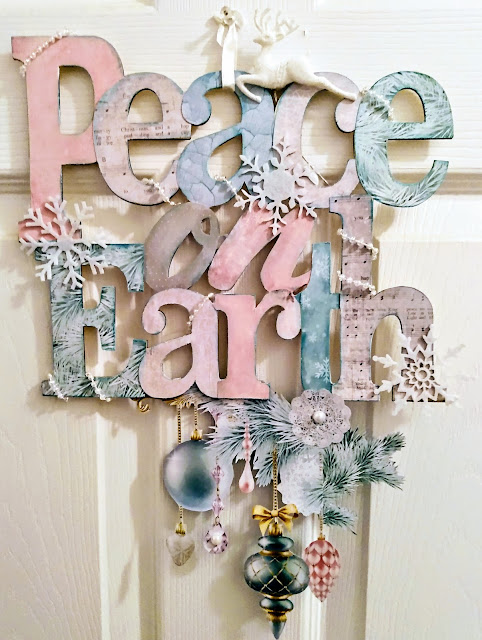


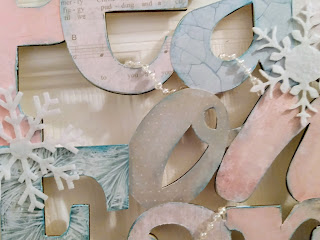
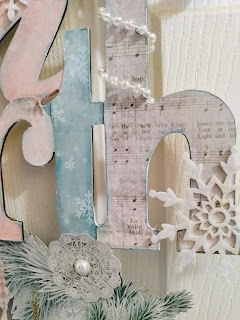
I used Kaisercraft Silver Bells and Christmas Wishes collections for this project, sanding and inking the edges of the papers after attaching them to the letters to create more definition. The wrapped pearl strings and felt snowflakes were attached with hot glue, and the large pearls were self-adhesive The glittery reindeer is from Michael's.

Come join the challenge at Creative Artiste Mixed Media Challenge Blog this month-anything goes, as long as it's mixed media! A reminder that we take a vacation in January but will be back again in February.

Thanks so much for stopping by, and I wish you a lovely, sparkly, glittery Christmas and a peaceful, joyful New Year. 

xx Lynne


Friday, 13 December 2019

Christmas trinket box and rosette tree/Home for the Holidays Blog Hop

Hello there hoppers! Lynne here with a little display made up of a trinket box I made using  the Gypsy Soul Lasercuts Treasure Chest and Studio75's Christmas Gift paper set. I was privileged to be invited to participate in this blog hop, and I know there'll be a lot of awesome projects for you to see along the way! Have fun!


I love to fussy-cut, so after I covered the chipboard pieces with patterned paper, I added cutout images for interest and dimension . The berries and little latch were from my stash.


I made a loop bow out of strips of paper for the top, inked the edges and added some tulle. I then topped it off with a bird image cut from the paper.


I purchased a tree made with rosette folds somewhere over the summer and used it as a pattern for this one, folding an 18" long piece that was about 2-1/2' wide for the bottom layer, then getting a little smaller for the two other ones/ I used a holly border punch before folding them They were glued to a skewer, then into a thread spool which I also covered with paper. A chunky gold bead and a white plastic snowflake finished it off.


I like soft colours, even at Christmas, so this project with these papers was perfect for me, and was a lot of fun to put together. I hope you enjoyed seeing it and maybe even found a little inspiration here....wishing you a wonderful Christmas season xx

The  blog list is as follows:


Friday, 6 December 2019

Olde World Christmas triptych for Creative Artiste

Hello there crafters and happy December to you! 'Tis the season, for sure, (although I'm really, really behind on everything this year!) and I wanted to create something with a warm Christmas feel to it. I remembered having some gorgeous vintage Christmas cut-aparts  in my stash,
and these old-fashioned Santas were the perfect size to fit into my triptych panels.


The piece itself is a Gypsy Soul Lasercuts item, the Arabian triptych. I primed it in white, then added clear DecoArt Crackle Glaze, then rubbed FolkArt antiquing medium over it to create a vintage effect and make the cracks stand out more.


When the pieces were put togethet, I chose chipboard, wood and diecut items to embellish the tops of each frame. These pieces were heat embossed with Pebbled Copper; sorry but I don;t know the manufacturer, as I received them in small unlabeled containers, bearing just the name of the colour. Again I added a little rub of antiquing medium.


This was a fairly simple project to put together but I do like the vintage feel of the finished project and I hope you do too. Thanks a bunch for stopping by; I hope you decide to play along with our December challenge, which can be found HERE. I wish you a wonderful Christmas season and look forward to sharing my creations with you again in the new year! xoxo
LynneJ

ITEMS USED
Gypsy Soul Lasercuts Arabian Triptych
DecoArt Crackle Glaze-clear
FolkArt transparent acrylic soft gel paint-sepia
Pebbled copper embossing powder
Versamark ink

Friday, 5 April 2019

Altered Tissue Box for Creative Artiste

Hello crafty friends! I decided to create a piece of home decor this month; I found the wooden tissue box at a thrift store-it had been painted white and stenciled with some simple and very colourful Christmas images. Since I used very thick papers, I didn't even bother to paint over them.


After cutting the paper to size. I added stencilling with homemade texture paste and some Tattered Angels mists. After the papers were adhered to the box with white glue, I inked the edges, then added diecut flowers and foliage along with some shells, beach glass, chipboard and wooden embellishments to create texture and interest.


I cut the image from another piece of the paper and attached it to the end that would be facing outward in my room-I loved the image but the piece it was on was too small to use for the front. I like how it looks on the end, though.

 I make my texture paste quite thick for crisp lines and no bleeding under the stencil.


Thanks so much for stopping by; this was fun to create and I love the idea of altering thrift store "uglies"! Have a terrific and creative week! xx

Monday, 27 August 2018

Altered Bath Storage Containers with Gypsy Soul Lasercuts

Hey there!I'm  here today with a simple project showing how easy it is to spruce up small containers to coordinate with your decor. My bathroom has beach-themed items and shades of beige and soft blue, so I came up with this duo :


As you can see, the glass jar just received a layered bow and dangling shells and chipboard pieces, but the other piece underwent a bit more of a transformation; the container coordinated with the room's former colours but hasn't suited it in a long time...


I decided to add texture by podging some issue paper to the surface, then coating it with tan acrylic paint when dry.


I dry-brushed the surface with small amounts of grey and white, then rubbed Rose Gold Metallique Wax over the creases for added definition.


The chipboard border and small pieces were painted with cream-coloured acrylic paint, then misted with Tattered Angels mists, blending a couple shades of blue and a light silver colour. When hat was dry, I brushed on a layer of semi-gloss clear finish to make these items stand out a little more from the background.


I used twine to attach the dangling chipboard elements and added some small shells. I layered decorative jute ribbon below the small twine bow on both containers


A few slightly larger shells were added to the border strip along the bottom edge.


I love that Gypsy Soul chipboard can be used in so many ways; a few small pieces like these can totally change the look of plain household items, and they can be finished to suit any theme. I love making elaborate and eyecatching projects  a lot of the time, but I appreciate the chance to do something simple like this to make use of something I already have as well. I hope you're inspired to give some of the items around your home new life and added interest....have a wonderfully creative week, and thanks so much for stopping by!

GYPSY SOUL ITEMS USED

Under the Sea Border

Beach Shape Set, small

OTHER ITEMS USED

Tissue paper
Mod Podge
Art Alchemy Metallique Wax, Rose Gold
Decoart acrylic paints
Tattered Angels Glimmer Mists
Wired jute ribbon by Recollections
Natural twine
hot glue gun

Sunday, 29 April 2018

Cherry Blossoms boxes for Scrap & Craft

Hello crafters!! This is Lynne and spring is finally here in Canada- I'm so pleased to see it! The lovely patterns in the Cherry Blossoms paper inspired me to decorate these plain 4" wooden boxes I found at a thrift store a while back-the small patterns in the 6x6 paper pack were perfect for a project this size.


I used pink tulle to embellish the tops of two of the boxes, with diecut flowers on one and sweet pink Cherry Blossoms on the other. The third box was embellished with a fancy diecut heart. I used three different types of pearls, one on each box, and fussy cut some flowers to add interest as well. The loops and spirals were just strips cut from the patterned paper. All edges were inked in charcoal grey.


I used:

I hope you enjoyed seeing my project, and I wish you a wonderful and creative week! xoxo

Monday, 10 July 2017

"Faith" Display Tray for Gypsy Soul Lasercuts


Hello friends and happy July! I just can't figure out where this year is going! One of my goals for this year was to do more faith-based art, and I recently had the chance to get my hands on some wonderful faith-related patterned papers. The collection I'm showcasing on this project is the aptly titled "Faith" line by Simple Stories:


I added bits and pieces from these two 6x6 pads that were in my stash as well-the colours and patterns coordinated amazingly well with my main paper choice!


For most of the cut-aparts that I used, I just flipped the paper over and traced around the shape, then added a little bit  along each edge before cutting them out. Many of the images were fussy-cut, then applied to contrasting backgrounds.


I adhered all the images I wanted to use to the base of the tray (other than those to be attached to the overlay, or would overlap it.) I used foam adhesive to pop up smaller pieces for dimension and interest.


I painted the overlay piece black, then heat-embossed its entire surface with Ranger Black Sparkle glitter embossing powder. I'm normally not a big glitter user, but I really liked the way it made this project pop!


The buttons were painted in pink and yellow to coordinate with the papers, then heat embossed with a light coat of Ranger Bridal Tinsel glitter embossing powder, then tied with a piece of teal thread.


Close-ups of some of the panels  and the dimensional items added to them:

(the little pieces of clothing were from some very OLD paper in my stash, and I couldn't resist using
them to illustrate a verse starting with the word "clothe"!!)


I hope you enjoyed this lively, uplifting and colourful project of mine as much as I enjoyed creating it!  The positive messages warm my heart; I wish you all a wonderful week full of love, joy and creativity!

GYPSY SOUL ITEMS USED

Display Tray Dome-coming soon

OTHER ITEMS USED

Simple Stories Faith papers
Pink Paislee Cedar Lane 6x6 pad
BoBunny You're Invited 6x6 pad
Ranger glitter embossing powders