Showing posts with label Christmas. Show all posts

Friday, 3 December 2021

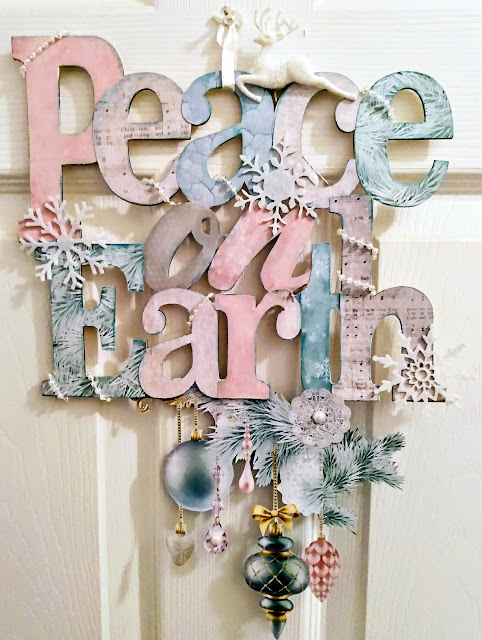
"Peace" Christmas wall decor for Creative Artiste

 Hello and happy December, friends! I love to decorate for Christmas, and have been making cards as well; right now my craft room is completely destroyed, spread with craft supplies, bins of decorations and ornaments, and Amazon delivery boxes!! Bonus-I have to have it all cleaned up and put away in time to use it as a guest room when my son comes home in a couple weeks! I'm actually grateful to have that incentive, or it could stay somewhere between "there appears to have been a struggle" mode and complete all-out "aftermath of natural disaster" mode until mid-January at least.


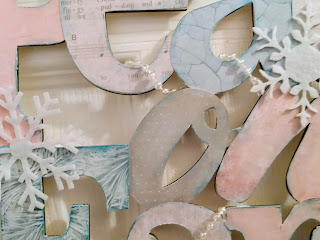
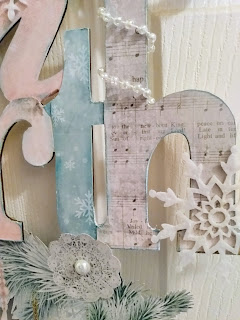
I used Kaisercraft Silver Bells and Christmas Wishes collections for this project, sanding and inking the edges of the papers after attaching them to the letters to create more definition. The wrapped pearl strings and felt snowflakes were attached with hot glue, and the large pearls were self-adhesive The glittery reindeer is from Michael's.


Come join the challenge at Creative Artiste Mixed Media Challenge Blog this month-anything goes, as long as it's mixed media! A reminder that we take a vacation in January but will be back again in February.

Thanks so much for stopping by, and I wish you a lovely, sparkly, glittery Christmas and a peaceful, joyful New Year. 

xx Lynne


Friday, 13 December 2019

Christmas trinket box and rosette tree/Home for the Holidays Blog Hop

Hello there hoppers! Lynne here with a little display made up of a trinket box I made using  the Gypsy Soul Lasercuts Treasure Chest and Studio75's Christmas Gift paper set. I was privileged to be invited to participate in this blog hop, and I know there'll be a lot of awesome projects for you to see along the way! Have fun!


I love to fussy-cut, so after I covered the chipboard pieces with patterned paper, I added cutout images for interest and dimension . The berries and little latch were from my stash.


I made a loop bow out of strips of paper for the top, inked the edges and added some tulle. I then topped it off with a bird image cut from the paper.


I purchased a tree made with rosette folds somewhere over the summer and used it as a pattern for this one, folding an 18" long piece that was about 2-1/2' wide for the bottom layer, then getting a little smaller for the two other ones/ I used a holly border punch before folding them They were glued to a skewer, then into a thread spool which I also covered with paper. A chunky gold bead and a white plastic snowflake finished it off.


I like soft colours, even at Christmas, so this project with these papers was perfect for me, and was a lot of fun to put together. I hope you enjoyed seeing it and maybe even found a little inspiration here....wishing you a wonderful Christmas season xx

The  blog list is as follows:


Friday, 6 December 2019

Olde World Christmas triptych for Creative Artiste

Hello there crafters and happy December to you! 'Tis the season, for sure, (although I'm really, really behind on everything this year!) and I wanted to create something with a warm Christmas feel to it. I remembered having some gorgeous vintage Christmas cut-aparts  in my stash,
and these old-fashioned Santas were the perfect size to fit into my triptych panels.


The piece itself is a Gypsy Soul Lasercuts item, the Arabian triptych. I primed it in white, then added clear DecoArt Crackle Glaze, then rubbed FolkArt antiquing medium over it to create a vintage effect and make the cracks stand out more.


When the pieces were put togethet, I chose chipboard, wood and diecut items to embellish the tops of each frame. These pieces were heat embossed with Pebbled Copper; sorry but I don;t know the manufacturer, as I received them in small unlabeled containers, bearing just the name of the colour. Again I added a little rub of antiquing medium.


This was a fairly simple project to put together but I do like the vintage feel of the finished project and I hope you do too. Thanks a bunch for stopping by; I hope you decide to play along with our December challenge, which can be found HERE. I wish you a wonderful Christmas season and look forward to sharing my creations with you again in the new year! xoxo
LynneJ

ITEMS USED
Gypsy Soul Lasercuts Arabian Triptych
DecoArt Crackle Glaze-clear
FolkArt transparent acrylic soft gel paint-sepia
Pebbled copper embossing powder
Versamark ink

Monday, 26 November 2018

Metal Ornaments for Gypsy Soul Laser Cuys


Hey people! Lynne here with a couple ornaments
that I rescued from the thrift store-they were actually a promo from some business and had their logo and name stuck on to them, and thus rather ugly. Fortunately it was done with a type of sticker and I was able to scrape it all off. Yay!

I started by attaching my chipboard pieces with Aleene's Tacky Glue-I held them down for a few seconds to be sure the pieces adhered properly to the curved surface. I added embroidery floss to the row of stockings and some letter stickers for my festive phrases.


I brushed on a coat of clear gesso-I love this stuff! It goes on white but dries clear, so you retain the look of the surface, but can apply different mediums to it. I wanted to use mist and it doesn't adhere well to metal.


The mist came next, then a little ink around the edges and across the letters to create contrast. 

I precoated the stockings with red acrylic paint, then brushed them with white glue when they were dry and applied flocking. The snowflakes were brushed with white glue then sprinkled with glitter. I added a second layer when it was dry to make them stand out a little more. I used a white glitter gel pen on the letters. Simple ribbon hangers and bows finished the ornaments off.


I'm putting my Christmas tree up over the weekend, so I took these photos of the ornaments hanging on my little Charlie Brown Christmas tree, so please imagine lush green boughs...


Thanks so much for stopping by, and I hope you're enjoying your Christmas preparations, or at least anticipating them!! Have a wonderful week! xoxo

GYPSY SOUL ITEMS USED

Winter Shape Set-contact store
Snowflake Shape Set
Tiny Christmas-coming soon

OTHER ITEMS USED

Aleene's Tacky Glue
Tattered Angels mists
Doodlebug designs flocking
diamond glitter
ribbon
Embroidery floss
Blue, green, and white inks
white glitter gel pen


Monday, 11 December 2017

A Gift of Love Christmas Sleigh for Gypsy Soul Lasercuts

Hello crafty friends! Many of us are up to our ears in Christmas creating, decorating, baking and what-have-you, and that's a happy place to be! The sleigh is one of my favourite GSL pieces, and I love the one I made for myself last year. My best friend loved it to, so I pulled out my (huge) stash of Christmas papers and told her to pick out what she liked best, and I would use it to make a sleigh for her!


There's a template of the side pieces included in the sleigh kit to trace around on your patterned paper, which is wonderful! I used some lovely old-fashioned Inkido Christmas papers, positioning them so the poinsettia pattern ran along the bottom of the sleigh. I hate measuring, so I also traced around the inside and back/front pieces and glued papers on them before putting the sleigh together.

I dry-embossed the fancy overlay and painted it gold before heat embossing it in antique gold.
(I painted the skis and edges of the main side pieces gold as well.)


I rubbed the edges with bronze ink for a richer look.


When attaching the overlay, I used these adorable itty-bitty clamps my hubby put in my Christmas stocking last year....they are soooo handy for gluing things together, holding them tight until the glue sets.


The bells were cut from another sheet of Inkido paper and were heat embossed with UTEE before being attached with thick Glue Dots. I used a larger one for the front of the sleigh.


When everything was put together, I placed a piece of styrofoam in the bottom of the sleigh before I added my greenery (which was cut from one of those artificial garlands) I cut the piece smaller than the sleigh because the garland greenery would be tucked around the edge before I added the stand-up embellishments.


The reindeer was already on a wire, but I attached the fussy-cut Santa and sentiment, diecut poinsettias and min wrapped gifts to kitchen skewers, then arranged them in the styrofoam piece. I then bent the wired garland around to cover the remaining styrofoam and showcase the embellishments and sleigh. I'm on a twisted paper kick these days and added a couple strips with Christmas sentiments to the arrangement.


I love Christmas and had a wonderful time putting this together! I love the way you can take any of the Gypsy Soul chipboard items and finish it so many different ways depending on your taste, decor, supplies, etc.

Wishing each of you a wonderful Christmas season, and I do
hope you take time to enjoy a little crafting in the midst of the hustly-bustly preparations!


GYPSY SOUL ITEMS USED

Santa's Sleigh

OTHER ITEMS USED

Inkido papers
Cuttlebug embossing folder
gold acrylic paint
Stampendous gold embossing powder
UTEE
Spellbinders poinsettia die
artificial pine garland