Monday, 26 November 2018

Metal Ornaments for Gypsy Soul Laser Cuys


Hey people! Lynne here with a couple ornaments
that I rescued from the thrift store-they were actually a promo from some business and had their logo and name stuck on to them, and thus rather ugly. Fortunately it was done with a type of sticker and I was able to scrape it all off. Yay!

I started by attaching my chipboard pieces with Aleene's Tacky Glue-I held them down for a few seconds to be sure the pieces adhered properly to the curved surface. I added embroidery floss to the row of stockings and some letter stickers for my festive phrases.


I brushed on a coat of clear gesso-I love this stuff! It goes on white but dries clear, so you retain the look of the surface, but can apply different mediums to it. I wanted to use mist and it doesn't adhere well to metal.


The mist came next, then a little ink around the edges and across the letters to create contrast. 

I precoated the stockings with red acrylic paint, then brushed them with white glue when they were dry and applied flocking. The snowflakes were brushed with white glue then sprinkled with glitter. I added a second layer when it was dry to make them stand out a little more. I used a white glitter gel pen on the letters. Simple ribbon hangers and bows finished the ornaments off.


I'm putting my Christmas tree up over the weekend, so I took these photos of the ornaments hanging on my little Charlie Brown Christmas tree, so please imagine lush green boughs...


Thanks so much for stopping by, and I hope you're enjoying your Christmas preparations, or at least anticipating them!! Have a wonderful week! xoxo

GYPSY SOUL ITEMS USED

Winter Shape Set-contact store
Snowflake Shape Set
Tiny Christmas-coming soon

OTHER ITEMS USED

Aleene's Tacky Glue
Tattered Angels mists
Doodlebug designs flocking
diamond glitter
ribbon
Embroidery floss
Blue, green, and white inks
white glitter gel pen


Monday, 12 November 2018

Rustic Christmas Crates for Gypsy Soul Laser Cuts

Hi-I'm happy to be here with a Christmas project inspired by a home decor piece I picked up recently; I love Christmas and am really embracing the rustic, homey themes I have been seeing so far this year. The deer in the center of my photo is the piece I purchased, and I finished the Little Crates to coordinate with it.


I started off by tracing around each section of the crates onto the back of my woodgrain papers; I did each side separately and then inked the edges with a charcoal grey ink.


When I cut the dark grey strips I rubbed them lightly with the Moonlight White ink to lighten them a bit, and the brown ones were rubbed with the Old Road ink, as I wanted to tone down the orangy golden hue.


I added diecut words and snowflakes to the fronts of the crates to mimic those on the deer, then filled the crates with some artificial greenery, berries and flowers to create a festive look. This was not a difficult project to create, but I'm happy with the way the crates look with my pretty wooden deer. I have a large wall unit in my living room that I fill with Christmas decor, and can't wait to put these up!


Thank you for stopping by, and I wish you peace and joy and a wonderfully merry and creative week!

Monday, 22 October 2018

Graham's first Jack-o-Lantern...layout for Gypsy Soul Lasercuts

Hey there crafty friends! I have a shocking confession to make....unlike what seems like pretty much all of my fellow crafters, I am NOT a huge fan of Halloween! GASP! I do however love the trappings of fall: pumpkins, acorns, squirrels and pretty leaves! That's why I decided to create a fall layout this week using a photo I just love of my son when he was about 2-1/2 with his very first Halloween pumpkins (ten guesses what he loved to watch on TV!) I love how the frame allowed me to add the fussy-cut image of my son-in the original photo he had been standing near the pumpkins but there was a lot of background clutter!


Th chipboard pieces were all painted with gold acrylic paint then rubbed with Hero Arts shadow ink in Orange. 


The pumpkins were run through my Cuttlebug in a Darice embossing folder. The orange ink emphasized the lovely embossed leaf pattern.


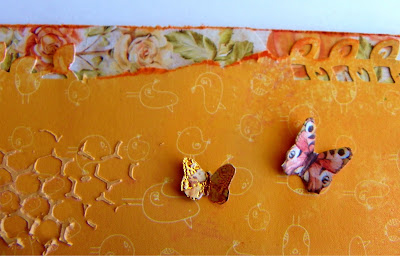
I randomly punched around the border of the paper with vine edge punches, then tore the paper in between even with the punchwork. I then inked all the edges with the same orange ink that was used on the chipboard. I stencilled with homemade texture paste and misted with Tattered Angels glimmer mist. The flowers and pumpkins were fussy cut from some pretty Prima paper.


I love layering different elements to create interest with a variety of materials and textures.


That little boy in the photo is now 26 years old, so this page brings back a lot of happy memories-thanks so much for stopping by and letting me share them with you, and have a wonderful week! xoxo

GYPSY SOUL ITEMS USED

Layered Frame Victoria Round
Fall Shape Set
Halloween Word Set-coming soon

OTHER ITEMS USED

Prima flowers and paper
Inkido paper
Tattered Angels glimmer mist
Prima and Tim Holt stencils
Hero Arts Shadow Ink

Monday, 8 October 2018

Best Fishes Card for Gypsy Soul Lasercuts

Hello there friends! I'm here today with a birthday card I made for my uncle, who turned 86 this past week. He has always been into fishing, hunting, and all that "guy" stuff, so I knew he'd get a kick out of a card made with these fun chipboard pieces!


I made the side step card by altering a template I found online to suit the size of the chippies; I started with a 7"x 10" piece of cardstock, and the dimensions are marked for you in the photo. Should you prefer to make a different sized card, there are lots of templates online; I just Googled side step card directions.

I painted the silhouette pieces black, then misted them with Tattered Angels glimmer mist in "It's Black" to add a bit of a subtle sparkle. I attached a piece of grey paper behind the boat so the details would still stand out.


The water was punched with a Fiskars border punch, then inked in a deeper blue along the edges. I layered them on the front for dimension, not gluing the upper edges down. I added a strip to each of the other steps as well, and tucked the fisherman behind the one on the second step

A piece of light orange paper was misted with yellows and oranges, then cut into a rounded sunset background. I mounted this onto black cardstock so it would stand out more.
I drew and cut out a couple black fish like the one on the line, and added them here and there on the card.


I added a couple dots of hot glue to hold the fishing line in place, but didn't glue it down flat. The title piece was painted light blue, then inked with the same ink I used on the punched water strips.


This photo shows the dimensional aspect of the card a little better.


I hope you enjoyed seeing my card and directions; I'd love to see how you might use this fun shape set By the way, my uncle LOVED his card-he said it was a "piece of art" and that he would keep it displayed for a long time...that made my day! Wishing you a lovely week; it's Canadian Thanksgiving and I'm thankful for all you great craft-lovers who I've had the opportunity to share my creations with-hugs! xxoo


Friday, 28 September 2018

Basket of Pumpkins for the Fall CCB Blog Hop


Hello crafty friends! I'm so glad you've come by today; I am blessed to be a part of a fabulous group of designers from all over the world who've joined forces to participate in this MEGA BLOG HOP!!!!!!  We're sharing fall-themed projects and hope to inspire you to create some of your own! You'll find that each one of us features products from  Tattered Angels, 7 Gypsies and Canvas Corp Brands-yes, we are all part of the 2018 CCB Creative Crew!! Each of these designers have created a project to share with you on their blog. Some are offering prizes, so please hop on through to each blog. You'll find the list at the bottom of this post.

Here's my finished project; I hope you like it and enjoy seeing the process I used to create it:


Each pumpkin is about 3" high and 4" across; I found mine at a thrift store, but I'd like to try carving my own out of styrofoam balls some time.


I had some fair-sized burlap scraps, so I started with those; to cover 1 rib, I needed a piece about
5"x 2 1/2", and I trimmed the tops to a point so there wouldn't be too much excess fabric. I tucked them into the grooves but added a little hot glue to keep them from getting messed up .After they were put together I misted each one with a variety of mists (see my supply list below)


For the leaves, I started with the sheet of Leaves on Ivory and misted all over with the same mist I used on the pumpkins, adding colours more heavily in some areas for a variety of hues. After doing so, I realised that because the paper was porous, the colours were lighter than what I wanted, so I fussy cut the leaves and brushed the with a coat of clear gesso before remisting, this time just using one or two colours on each leaf. I then heat embossed them with UTEE to enhance the colours even more.


I created sprays of leaves and glued them onto the pumpkins along with contrasting bows. I have a large straw pumpkin and a couple terra cotta ones, and I'm looking forward to creating a fall arrangement this weekend, including my new little basket of burlap pumpkins! I hope you enjoyed seeing my creation; if you follow my blog and leave a comment, you'll have a chance to win an envelope of CCB goodies, including a few of my fall leaves...

CCB ITEMS USED

Tattered Angels Glimmer Mists: Rouge, Rose Gold, Candy Corn, Summer Glow, Tattered Leather, English Ivy
Canvas Corp burlap: Natural, Wheat
 Gypsy Moments Mixed Media Pad: peach burlap

Here's the list of blogs to visit; have a great hop!! I'll be drawing a name from my comments when the hop has ended and will be posting it here, so stop by again and see!


  1. Scrappy Cafe (Betz Golden) https://scrappycafe.blogspot.com/2018/09/huge-fall-blog-hop.html
  2. Papierstau (Sanna Lippert) http://www.papierstau.at/fall-blog-hop-canvas-corp-brands/
  3. Marie Nicole Designs (Marie Heiderscheit) https://marienicoledesigns.wordpress.com/2018/09/28/farmhouse-autumn-mantel-teal-pumpkins
  4. Steph Ackerman - https://stephaniescraps.blogspot.com/2018/09/fall-blog-hop-with-canvas-corp.html
  5. The Crafty Robin - https://elizabethr-thecraftyrobin.blogspot.com/2018/09/fall-canvas-corp-blog-hop.html
  6. Monica Taylor https://taylormadecards4u.blogspot.com/2018/09/toil-trouble-fall-blog-hop-with-canvas.html
  7. Karla Yungwirth https://creative-love-affair.blogspot.com/2018/09/canvas-corp-brands-fall-blog-hop.html
  8. Lynne Joncas https://scrappysquirrelsnest.blogspot.com/2018/09/basket-of-pumpkins-for-fall-ccb-blog-hop.html
  9. Priya Satish https://creativemotif.blogspot.com/2018/09/ccb-fall-hop.html
  10. Erin Reed - https://scraps-of-reflections.blogspot.com/2018/09/diy-give-thanks-stenciled-fall-wood-sign.html
  11. Natassa Blazaki - https://artrecipesandmore.blogspot.com/2018/09/welcome-to-fall-ccb-blog-hop.html
  12. Peggy Lee Baker https://pegbaker.blogspot.com/2018/09/ccb-fall-blog-hop-altered-paper-pumpkin.html
  13. Nadine Carlier - https://myscrapnstuff.blogspot.com/2018/09/fall-blog-hop-with-canvas-corp-brands.html
  14. Jaine Drake - http://www.basementstudio.lu/fall-ccb-blog-hop/
  15. Christine Santos - https://csantossite.wordpress.com/2018/09/27/boo-ccb-fall-blog-hop/
  16. Viktoriya Porechnaya https://vitulya.blogspot.com/2018/09/fall-ccb-blog-hop-halloween-bouqet.html
  17. Hema VelCraft https://velcraft.blogspot.com/2018/09/autumn-smile.html


Monday, 24 September 2018

Little Dreamer Canvas for Gypsy Soul Lasercuts

Hello crafty peeps! Today I'm here with a 12x12 canvas I created using chipboard from the Baby Girl Clothesline Set, Tattered Angels mists and lots of little goodies from my stash
.

The first thing I did was figure out more or less where I wanted everything, then I took  picture, since I would be moving things to add the stencilling, and would no doubt forget where I wanted everything...


I made the texture paste with baby powder, white glue and white acrylic paint and stencilled in the open areas , then covered the whole canvas with white gesso. Since I was going to be using soft colours, I made sure most of the embellishments were light in colour, as they're easier to cover.


After misting with four glimmer mists, I allowed it to dry then misted again for a little more depth of colour, then I rubbed a little metallic wax on the chipboard pieces to make them stand out a little more.


I have been creating canvases for a local art shoppe, so I'm challenging myself to come up with different themes for my projects. Thankfully Gypsy Soul Lasercuts provided such a great variety of pieces and titles that I don't expect to run out of ideas for a long time!

Thanks so much for stopping by, and I wish you a dreamy, colourful, creative week!
xx

GYPSY SOUL ITEMS USED

OTHER ITEMS USED

Prima and Studio75 stencils
Tattered Angels glimmer mists: Festival, Rose Gold, Summer Glow, Coral Reef
Art Alchemy Metallique Wax-Rose Gold
white gesso
various flowers, ribbon, etc.

Sunday, 16 September 2018

"Hearts" card for Scrap and Craft

hello crafty friends! I'm here today with a dimensional card I created for Scrap and Craft with the beautiful Violet Love collection by Studio75. I've been really enjoying hunting down interesting card designs to try with the lovely papers carried here at Scrap and Craft; I definitely want to adapt this one to a Christmas card design


Studio 75 Violet Love 12x12 paper pack
Adhesive pearls, pink


Other than a few adhesive pearls, I kept my embellishments flat so the card would fold flat enough to go into an envelope.


The paper is so delicate and pretty, and comes with a sheet of sentiments, so you can make a beautiful card for any occasion! I'd love to see what you create with Violet Love...have a wonderfully creative week xx

Monday, 10 September 2018

"Walls"-art journal page for Gypsy Soul Lasercuts

Hello there, crafters!  Ever since I first received the new stamps in the mail, I have had an art journal page idea in mind, and it has taken me this long to finally bring it to life!! I think most people build walls in their lives at some point, and I found a sentiment that put a positive spin on that concept:

 I started out with brick-background patterned paper, and then added tears with yet another brick paper peeking through them (sometimes we have multiple walls!) I then stamped with the brick stamp using leather brown ink. (Misting I added afterward also shows in this photo) I added the ink to the stamp unevenly to give a varied depth of colour.


I decided I wanted the stamped stones to have a little more texture, so I did the stamping with Versamark ink, then heat, embossed the stones with Distress Embossing Powder, aptly named Pumice Stone. I love the texture it created, and the stamps worked beautifully with the Versamark.


The Brick Wall texture sheet is a huge favourite of mine, and I managed to use not only pieces from the sheet but also the brick-shaped pieces punched out from it. Those pieces were painted grey, then I hand-printed the words of the sentiment onto them, and added a little in in Leather and Honey here and there for interest. The mist adds a little more colour and interest as well.


The texture sheet pieces were cut to go around the window in the center and painted brick-red, then heat embossed with Pebbled Copper embossing powder. I love the variegation in the embossed colour!


As for the window in the center, I don't have a closeup (oops!) but I ran it through my Cuttlebug in a woodgrain embossing folder, then painted it Antique White before rubbing a little Honey ink  over the raised surface. I decided to stick a photo of myself inside the window to make the page more personal. A few spritzes of Tattered Angels mist in Old Penny finished the page.

Thanks for visiting, and I hope you enjoyed seeing my page; I don't often use stamps but I really do like these! Have a terrific week xx
Lynne

GYPSY SOUL ITEMS USED

Brick Wall
Windows 4-panel, square
Foam Stamps-coming soon

OTHER ITEMS USED

Colorbox inks-Leather, Honey
Tattered Angels mist-Old Penny
Ranger Distress embossing powder-Pumice Stone
Pebbled Copper embossing powder (brand unknown)
Versamark Ink

Sunday, 2 September 2018

Love and Friendship album for Scrap & Craft

Hi crafty friends! I'm here today with a cheery little album filled with quotes about love and friendship, made with the sweet and pretty Cherry Blossom collection from Studio75.

I had a bulletin board with these happy quotes and more on the door of t craft room, but I took them down when I needed the space for chipboard, and I missed seeing them, so I thought this little book would be a great way to showcase some of my favourites.
The album itself is the ATC Ticket Journal from Gypsy Soul Laser Cuts.


 I fussy cut some of the  flowers from the papers, and the larger flowers came from the 12x12 paper set. Some lace, ribbon and punchwork completed the pages, and I added some dimensional artificial flowers to the top page.


supplies
Cherry Blossom 6x6 paper set
larger flowers from Cherry Blossom paper set (12x12)

 I'm so glad you stopped by to see my latest project and I hope you enjoyed my collection of happy quotes; have a wonderful week, full of love and friendship!