Monday, 1 February 2016

All you need is love-and a cat! for Gypsy Soul Lasercuts

hello and meow! Happy Monday and Happy February! I had so much fun putting this project together; as an official crazy cat lady I thought it was only appropriate to make one of these!


I painted the frame black then heat-embossed it with clear embossing powder to create a shiny enamel-like finish; I liked the way the black set off the colours in the images (which come from Graphic 45's Raining Cats and Dogs collection)


The chipboard cat that is using the frame as a scratching posts (like my cats use my furniture for...sigh...) was painted black then covered with black flocking for a furry effect.


The tray went together easily once I had all my images and papers placed where I wanted them; then I added a few fussy cut bits and pieces from the paper for dimension and detail.


You could easily incorporate photos into this project as well; with 8 cats in my house I just couldn't choose who to showcase here though-I certainly wouldn't want anyone to feel left out! There is also a dog-themed tray in the Gypsy Soul store so whatever your furry friend preference is I'm sure you could create something wonderful with one of these-Have yourself a purr-fect week!

Gypsy Soul lasercuts items used
Photo Display Tray-Cat's Meow
Cats Shapes Set

Monday, 25 January 2016

Be Who You Are...Art Journal Page for Gypsy Soul Lasercuts


hi! Today I'm sharing an art journal page I created using my absolute favourite quote ever-by none other than the amazing Dr. Seuss!! I've been wanting to use this quote on a journal page for ages and the adorable Little Dancers inspired my design:


I covered the dancers with patterned paper then sanded and inked the edges.They were run through an embossing folder then inked on the raised surfaces. I added tulle skirts and pearl belts to complete the look.

The little items on the ribbon banner were all painted with acrylic paint; the dragonfly was then coated with glitter gel and the others were heat embossed with glitter embossing powder.


I added a little stencilling with texture paste and some inking through a punchinella stencil as well as some misting and a few little diecut squirrels just because I happen to love those bushy-tailed little critters! The Autumn Anthology papers by Blue Fern Studios had the whimsical feel I wanted for this page....thanks so much for stopping by and have a wonderful week!


Saturday, 23 January 2016

Counting my blessings-a gratitude journal

I've been rereading a lovely and uplifting collection of books; the Simple Abundance collection by Sarah Ban Breathnach and one of the things she recommends to write down five things you are grateful for at the end of each day. I altered this journal for that purpose and my design was inspired by the lovely mood board at Tresors De Luxe.


The mood board and inspiration can be found here:
http://www.letresorsdeluxe.com/category-s/205.htm

I used Fabscraps Marie Antoinette papers and was inspired by the soft blue, the keys, and the teacups in the mood board images.

Thanks so much for stopping by and remember to be grateful for something every single day!

Monday, 18 January 2016

COFFEE-a mixed media canvas for Gypsy Soul Lasercuts

Hello there!It was an interesting week around here because both my best friend and I (we ride to work together) had our thermoses break so we were without life-sustaining hot beverages on our lunch break!Let me tell you it was NOT pretty...but on the bright side our crisis did inspire this canvas!


I started by stenciling with texture paste and then I attached the title and all the elements with hot glue. I primed the entire piece with gesso them painted here and there with Twinkling H2Os before adding another coat of gesso to soften and blend the colours. I misted with tan and gold mists and inked the words and coffee cup with gold and brown ink on the edges (red on the "love" ticket and the heart)


This was a fun project to put together and would be a great gift item to create for any coffee-lover! Thanks for visiting and may your week be filled with hot beverages and warm hearts!

Gypsy Soul Items Used

Coffee & Tea Shapes Set
Buttons shape Set
Build-a-Layout: Love Birds (ticket)
Fanciful Elements (flourishes)

Monday, 11 January 2016

Shabby Desk Organizer for Gypsy Soul Lasercuts

Yes my work table really IS a hot mess! When I read the description for the Desk Organizer 2 I knew it had to be mine...


The Organizer went together easily; I papered it with Kaisercraft Rustic Harmony and added a bit of stenciling with texture paste. The edges were painted with sage green acrylic paint then rubbed with  gold Gelato as was the border strip I attached at the top. I added a little dangly bling along the one upper edge and some fussy cut flowers on the front of the drawer.


The organizer is perfect  for my small paper pads; this way I might actually remember to USE them!! When they were hidden away it was a definite case of "out of sight-out of mind". The drawer holds a few partial pads that are in bags to contain the smaller pieces and the little jars along the top (which I papered to match) hold various fibers and twines.


Now whether I actually get more organized remains to be seen but at least I have some great-looking storage pieces on my worktable (I have the Desk Organizer 1 and the Brush Caddy as well) Even if your scraproom is super-tidy this is a great piece to have and is also fun to decorate!

Gypsy Soul Items Used
Desk Organizer 2
Banner Border Strips

Other Items Used

Kaisercraft Rustic harmony papers
Prima circle lattice stencil
Graphic 45 button brad (knob)
Metallic Gelatos

Monday, 4 January 2016

Generations-a heritage layout for Gypsy Soul Lasercuts

Hello there; happy New Year and happy January to you! Although I love creating a variety of projects layouts are my first love so I thought it would be appropriate to start the new year off with one.


I coated the clock with Dusty Attic rusting powder then brushed on antique gold acrylic paint here and there to create a vintage effect; I love how detailed the clock is!


I covered the first two layers of the cameo piece with patterned paper then sanded and inked the edges. The profile piece was painted with acrylic paint then heat-embossed with UTEE to give a glossy raised finish.


The photo I used is a portrait of my great-great grandparents; she was of French heritage born here in Canada but he came over from Ireland during the potato famine in the mid 1800s. I've been so enjoying the heritage photos I've gotten of both sides of my family; they're such a pleasure to scrap with and there are so many gorgeous pieces in the Gypsy Soul store that complement them so well.

Thanks for stopping by and I wish you a year full of happiness and creativity!!

Gypsy Soul Lasercuts items used

Fashion Cameos
Hanging Clock Set

Monday, 28 December 2015

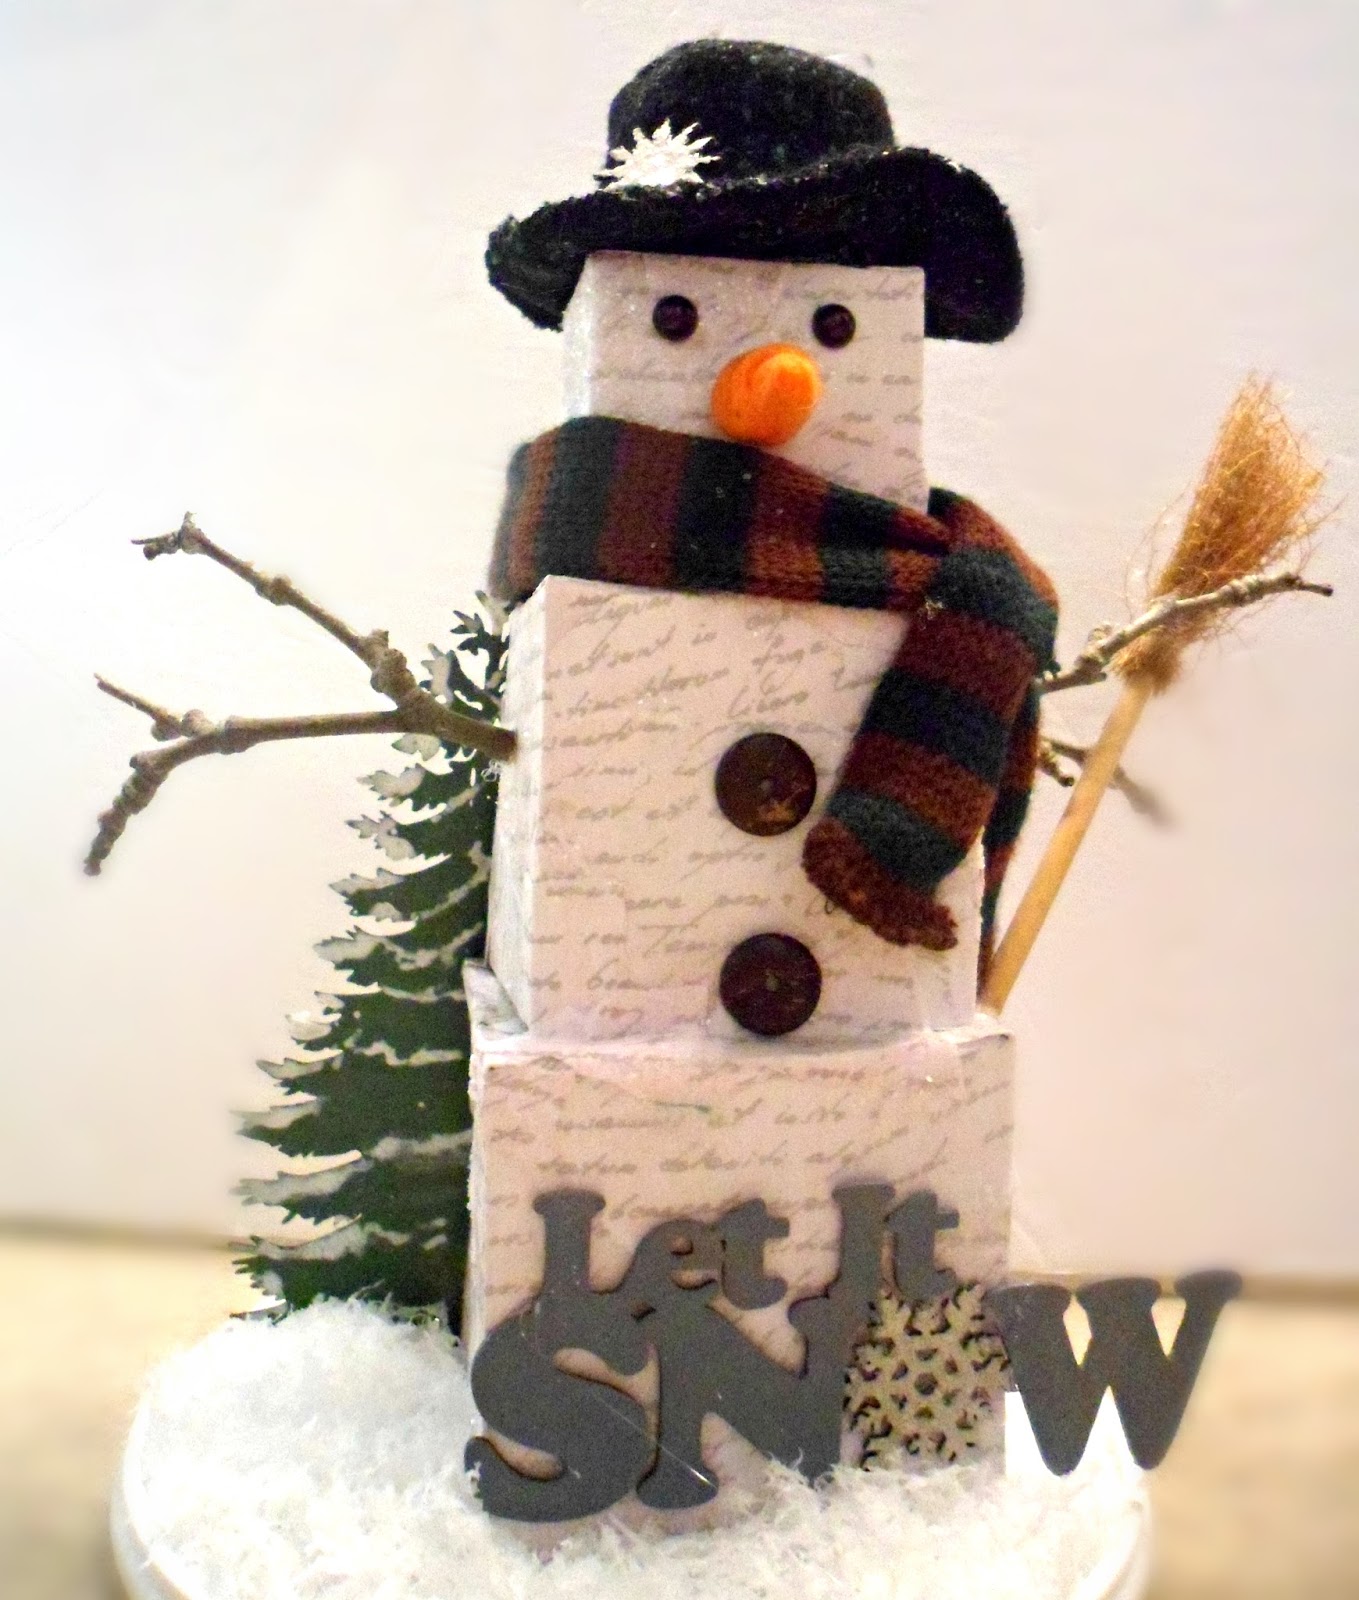
Rustic Snowman for Gypsy Soul Lasercuts

Hi! Let's make one thing clear-although I love snowmen I am NOT a fan of snow at all! I'm really enjoying our mild green Christmas here in southwestern Ontario and I probably should have asked Gina to custom-design a "let it MELT" word piece for my project!! However I had a wonderful time creating this little guy and I thought the word piece from the Winter Shape Set suited him perfectly!


I used the Artist Trading Blocks and covered each of them with torn paper using Mod Podge for a collage effect then attached them in a stack.I brushed the surface randomly with a little more Podge and sprinkled clear glass glitter on it. The word piece was painted with acrylic paint then stamped and heat-embossed with clear embossing powder. The snowflake on that  piece and on the hat were painted .white then sprinkled with the glass glitter.

The tree was painted then stamped and heat-embossed and then I tried out a really cool product that was new to me-the Marvy Uchida Snow pen! I drew the snow on with the pen then let it sit for a few minutes before applying the heat tool and -voila-3D puffy snow! Now I want to run around putting (pretend) snow on everything!

The eyes are adhesive pearls coloured with a Sharpie and the arms are little branches from one of the sycamore trees in my yard; the hat and scarf were rescued from a worn out snowman decoration I had.

Whether you're up to your waist in the cold white stuff or baking in summer heat (or anywhere in between) I hope you enjoyed my little snowman. Have a super day and thanks for stopping by!