Monday, 2 November 2015

Hang On To Hope-layout for Gina's Designs

Hello fellow crafters! Here in Southwestern Ontario we're deep into fall and heading toward-ugh-winter; when I saw this image it made me think of how springtime is hope fulfilled after a long cold winter and that we often need to keep a little springtime in our hearts when our circumstances seem like a big patch of winter in our lives as well.


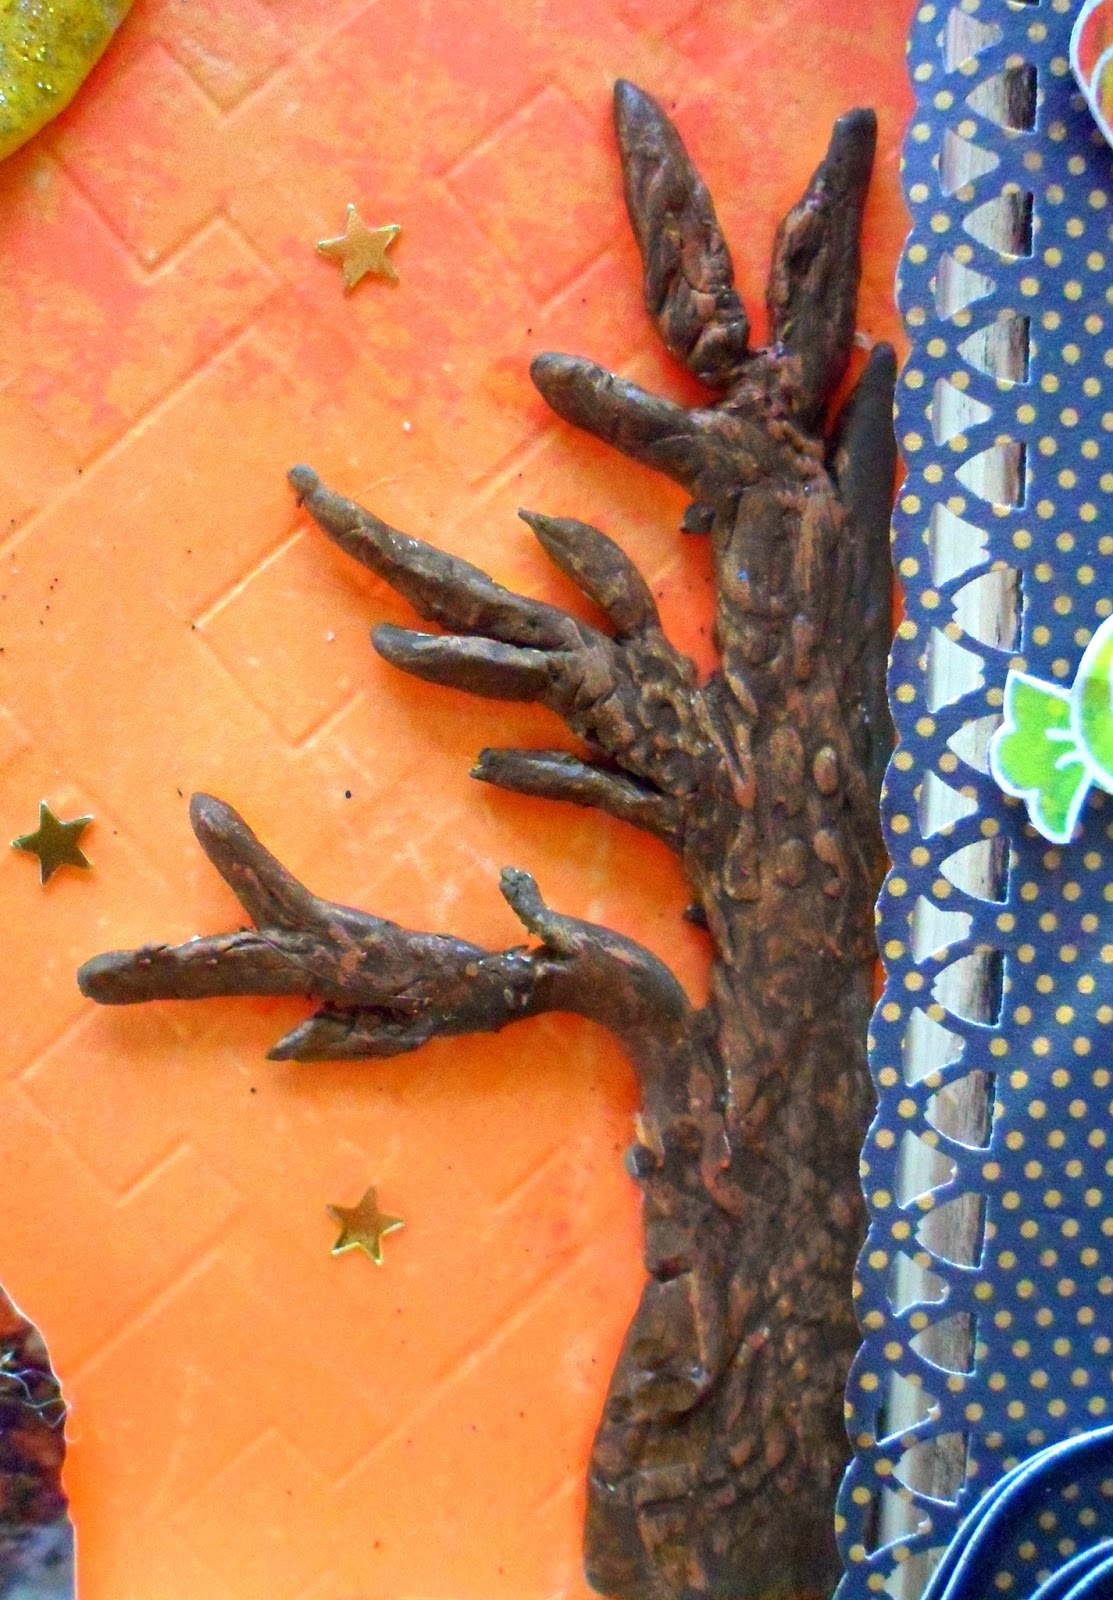
The tree branches were perfect for extending the image; I ran them through my Cuttlebug in a woodgrain embossing folder then painted them brown to match the photo. The leaves were painted green then dabbed lightly with other colours like the ones in the photo. I brushed the pieces with Glossy Accents to give them a bit of a sheen.


The word piece was painted with acrylic paint then heat-embossed with clear embossing powder. I then mounted it on coordinating patterned paper.


Punchwork along with some stencilling and stamping completed the background then I added a few paper strips to mimic the design on the bottom of the photo.I had a great time creating this cheery project and love the way the branches fit onto the design so perfectly-thanks for stopping by and hang onto hope today and every day!

Gina's Items Used

Leafy Branches with Birds
Word Elements 1

Other Items Used

Marion Smith Posh papers
embossing powder and Versamark ink
acrylic paints
Glossy Accents

Saturday, 31 October 2015

Gina's Designs/Creative Paperclay Halloween Blog Hop

The Creative Paperclay Design Team has teamed up with
Gina's Designs Lasercuts Design Team
for a Halloween Themed
Blog hop.
We are excited to show off our Halloween projects and even
more excited about the fact that
YOU can win a prize!
Prize Package Includes
1 pound package of Paperclay
1 sample package of Sandits
and
$25 shopping spree to Gina's DesignsLasercuts
How to enter - each of these will get you one entry
1) enjoy the hop
2) Stop by each blog on the hop and leave a comment
3) Pin each project on your Pinterest site
4) share this post on your Facebook page
5) Like Creative Paperclay Facebook page
6) Like Gina Designs Facebook Page
Here is the List of BLOGS:

<!-- start InLinkz script --> <div class='InLinkzContainer' id='573682' > <a rel='nofollow' href="http://www.inlinkz.com/new/view.php?id=573682" title="click to view in an external page.">An InLinkz Link-up</a></div> <script type='text/javascript' src='//static.inlinkz.com/cs2.js?v=116'></script> <!-- end InLinkz script -->


My Project:

I created a fun reverse canvas project featuring a photo of my daughter in her costume when she was 4 (she's 20 now!)
,
I created a moon, a tree, and some fall leaves with the paperclay. The moon was painted yellow then brushed with a few coats of gold glitter glue. The tree I shaped by hand, then pressed into a woodgrain embossing folder to create the texture. I painted it with brown acrylic paint and them drybrushed it with other shades of brown.

The leaves were shaped by pressing small pieces of the paperclay onto metal leaves. I then brushed them with matte medium to create a less porous surface before colouring them with alcohol inks.

The Wicked title piece from Gina's was covered with some lively patterned paper, then I sanded and inked all the edges.

The witch piece was painted black then stamped with Versamark ink in a random dot pattern using a Finnabair Prima stamp and then heat embossed with black glitter embossing powder.

Some fussy cut elements from the patterned paper and black cat stickers from my stash finished the effect.

Thanks a bunch for stopping by and have a "Wicked" Halloween!

Gina's Items Used
Title Wicked
Witches

Monday, 26 October 2015

Dream-word art for Scraps of Elegance and Gina's Designs

hello there and Happy Monday! Yeah I know-a lot of people think those two words don't belong together ,but as long as you have a dream in your heart every day can have at least a little bit of "happy" in it! I created this piece to remind me of that on days when I need a little boost.


After painting the edges of the piece I covered each letter with patterned paper from the beautiful Prima Royal Menagerie collection from the October Scraps of Elegance kit "Tiffany's Style" then sanded the edges with Sandits before inking them. The base was also covered with coordinating paper.

The sand dollar from Gina's Beach Shape Set was covered with homemade texture paste (I spread it with my finger to keep it from going into the cutout parts-I love to get myself messy!) and the starfish was spread with sand paste made up of sand, white glue and acrylic paint.
 

I added tulle to the base behind the word to showcase the
 paper butterflies which were attached to  pearl sprays. The dragonfly and shells are Prima resin pieces which were drybrushed with acrylic paint; the shells were included in this month's SOE kit and the dragonfly was from a previous kit. Some ribbon roses and pearls completed the project.

Thanks so much for stopping by and I hang onto your dreams; my wish for you is that all the very best ones come true!

Friday, 23 October 2015

Scraps of Elegance October kit projects

hi! I've been so enjoying creating with the fabulous October kit "Tiffany's Style"-the papers and added goodies are wonderful and sooo suited to my crafting style! These are the projects I've done which aren't affiliated with any other DTs or blog posts:


The shaped background piece was included in the kit; I covered it with some of the paper and added some texture paste with the included stencil. I then had a great time finishing it with a combination of kit pieces and goodies from my stash.


This layout features a photo sent by my son from Fudan University in Shanghai where he is studying  the Chinese language this year in a scholarship program. The round photo is a cutout of the university's logo from another photo he sent.


This page features a photo of a wire sculpture taken by Jenny Wren Photography and found on Facebook-I just loved the feel of the photo and thought the dreamy papers set it off perfectly. Some stencilling and fussy cutting  as well as a bit of punching and diecutting completed the effect. Thanks heaps for stopping by and I wish you a terrific day!

Monday, 19 October 2015

Follow Your Dreams/Fudan...a layout for Scraps of Elegance and Gina's Designs

Greetings from Shanghai! No, I'm not there-I'm still here in Ontario Canada-but my son is there at Fudan University and this layout features one of the photos he sent me. It was taken in one of the gorgeous garden areas on the grounds there and I couldn't wait to play with the Oriental Shape Set I ordered from Gina's knowing that Graham would be sending me photos, as well as the fabulous papers and embellishments in the October Scraps of Elegance kit "Tiffany's Style"


I used the FabScraps Cherished papers; as soon as I laid the photo on top all the reds just seemed to POP! Lots of distressinginking and fussy cutting were all I needed to create the effect I wanted to showcase this awesome photo.
I painted the pagoda with acrylic paint then heat-embossed it with UTEE to create an enamelled lookthen added the Asian coins. The two at the back are actual coins which I found in a Chinese shop in Toronto a few years ago and the top one is a brad that I removed the back from.


I covered the Asian lady piece with some embossed paper I found at a stationery shop ages ago and have been hoarding...uh I mean SAVING... for the right project.


The red of the paper actually matches the paint and the handstitching a lot more closely than it appears to here in the photo.


Some lovely Prima flowers tiny crocheted doilies and diecut foliage complete the effect; since the papers are quite busy I tried to keep the added details down to allow the photo and the red elements to really stand out-thanks so much for stopping by; I'm sure there will be more projects coming up using some of my son's great photos and I hope you enjoy sharing his year-long adventure with me!

Gina's Items Used

Other Items Used

FabScraps Cherished papers
Prima Royal Menagerie flowers
UTEE
embroidery floss

Sunday, 18 October 2015

Magic-for Scraps of Elegance

hi-I had a great time creating this little project with the October Scraps of Elegance kit "Tiffany's Style" and some bits and pieces from my stash.


I used Prima Royal Menagerie paper for the background and a coordinating Prima stencil; the sentiment card is from Kaisercraft Enchanted Garden


Thanks for stopping by and have a magical week!

Monday, 12 October 2015

Gingerbread Memories-a mini album for Gina's Designs

Hi! Yeah, yeah- I know it's only October and Halloween isn't even over with, but I am a Christmas girl through and through and as soon as I saw this adorable little chipboard album from Gina's I knew exactly what I wanted to do with it!

Ever year when my kids were little I'd bake gingerbread houses for them to decorate
, and once they started school I made a bunch and had a "gingerbread party" for them and their friends the second Saturday of every December.

The cute little windows, candy canes and swirly candies were all included in the album package as well as the icicle trim along the roof. I used texture paste on that piece and simply painted all the other. I covered the album itself with patterned paper then sanded and inked the edges. The door I attached in a way that it would open (made holes and tied them with embroidery floss) and then put photos of my son and daughter decorating their houses inside.

Dies
, punches ribbon and a whole bunch of fussy cutting completed the project, which will be a special keepsake for my family now that both kids are grown up and out on their own.


Thanks so much for stopping by and remember that it's never too early for Christmas crafting; in fact I think the world would be a much happier place if we could hang onto our Christmas spirits all year long! Have a great day!